Pages

Thursday, March 29, 2012

Taking a Bitter Pill

This is my chosen cup to drink from.

I take a bunch of meds for fibromyalgia, back problems, hip issues, knee deterioration and lately shoulder pain.

I used to have just a regular kitchen glass in my bathroom to take my medicine. It would get dirty and yucky. I don't know why I didn't trade it out for a fresh one daily. It got gross and then off to the dishwasher it would go and another nondescript cup would move in in it's place.

One day as I was about to grab another plain old kitchen glass, I thought," I have struggled to add beauty to the rest of my life. Why not in this task too?" After all It is part of taking care of myself. I guess it is more important say than, not having chipped polish on my toenails or making sure I toss out holy socks and underwear. As a younger mom I used to let those things go and did whatever it took just to get by, day by day. But now as a middle aged woman I am more picky about the details. So indeed; why not add beauty here too. It makes taking my medicine an act of self care and it makes me mindful of my blessings as well. And I keep this one clean!

Tuesday, March 27, 2012

Etsy Store Items

After I get my next antique booth up and filled at another antique mall, I will be posting items like these on my Etsy store. These type of things go into my booths as well, but they are there for eye candy. Most of the buyers around here are looking for old rusty things and peeling paint more. Well, anyway, I love to make crafts and feel a deep need to share those creations with the whole world! So the Internet is a good thing indeed. Artists have never lived in a better time than now. Mainly because we don't have to face a jury just to display our stuff. I hit publish and I get instant gratification. Now I know that I have to get traffic to this site and to my Etsy site, but I believe the more items I put up and the more I write here, the greater the chances of getting found. I also have heard, from my web designer Jennifer, that  it is very important to hook up to already successful blogs and ask if I can guest post there. Also, Etsy offers all sorts of tutorials on how to get found on their search engine too.

So I present to you these beautiful objects for your consideration before they hit my Etsy store..


This is a three tier candy dish/pin holder/button holder, whatever holder. I used E600 glue to marry all the small dishes together.

These are miniature cloches containing treasures from the sea.  I used upside down candle holders glued to candlesticks.

Here I glued together inexpensive candlesticks, vintage jelly jars and old aluminum jello molds to create very interesting votives. I glued on random bits of sparkly leftovers which were at the bottom of my bead bag. Even broken shards of mirror were put to use to create something lovely made from recycled scraps. This is a very "green" project

I bought this pretty bottle from the thrift store and gussied it up with a label I downloaded from the Graphics Fairy at http://graphicsfairy.blogspot.com/. After gluing the label to the bottle I dry brushed on burnt umber and yellow ochre paint to age the label.

This little box used to be a Christmas box. With the help of Martha Stewart glitter it looks springy and cheery.

These paper roses were made from leftover tags from my antiques booth. Go recycling!

And lastly; here is a little tin that the future owner can turn into a portable sewing kit, The top  and side image are from The Graphics fairy. The top one is actually printed on fabric run through my laser jet printer. You iron your fabric out super flat and adhere it to freezer paper using Elmer's spray adhesive. Next cut the cloth/paper the exact same size as a piece of printer paper. Iron out again to get super flat and then run it through just the same way you would send any specialty paper through your printer (very carefully). The results can be used on whatever craft you can dream up!

 I hope you enjoyed these ideas, and I hope you  have a very crafty day.

 Yours', Cynthia

Monday, March 26, 2012

Antique Booth At Bear Ridge

Well booth number two at Bear Ridge Antiques went up this last week. It was a huge push of buying, cleaning, and tagging. It takes a bunch of work when a booth goes up from scratch. Weeks of picking through thrift stores and garage sales and flea markets finally pay off with the creation of a beautiful vignette that is friendly and shoppable. But I am still new to this business and just pray that people will come and purchase my hand-made and hand picked goodies. It feels like hanging my heart out in public for all the world to see. So I get really nervous if folks don't buy stuff and I take it personally if nothing sells.

That will never do, I intend to keep a strong and positive mindset. I will be a successful entrepreneur!

But I tell you, I love all of this stuff. I hope my customers and you love it all too. In the near future I will be opening up an Etsy shop so I can offer the same type of wonderful treasures that I either find here in the flea markets or the goodies will be hand made by me.

But for now, I hope you enjoy these pictures as you come shopping at my booth today.

  These chairs were a sad and faded ugly blue before they got a coat of paint. Yes paint. I figured if an artist can prep a canvas with gesso and paint, why not a whole chair as a 3 dimensional canvas?

The graphics on the chairs and other pieces are from http://www.graphicsfairy-diy.com/. Better known as The Graphics Fairy. Thank you so much! You make my stuff look great!

After I painted the chairs and let them dry for a couple of days, I applied the images with the help of a projection machine that makes images bigger. Using a plain old black Sharpie, I traced the outlines first and then filled in the centers. Easy as pie.

 Some other things in the booth are items cobbled together with E6000 glue. The candy dish on the left is an example. On the right (requiring no glue) is vintage bird cage I fell in love with at a flea market in Springfield MO.. I gave it a teacup "bird"to make it cheery.

There is more fun stuff on the shelves.Behind them is make-do newsprint wallpaper. The shop owner, Dee, suggested it. I think it will mellow to a lovely gold as it ages.

This piano bench got a layer of vintage sheet music and a design of an antique skeleton key (from the Graphics Fairy). I added some dry brushed white paint to lighten it a bit and give the whole piece texture.

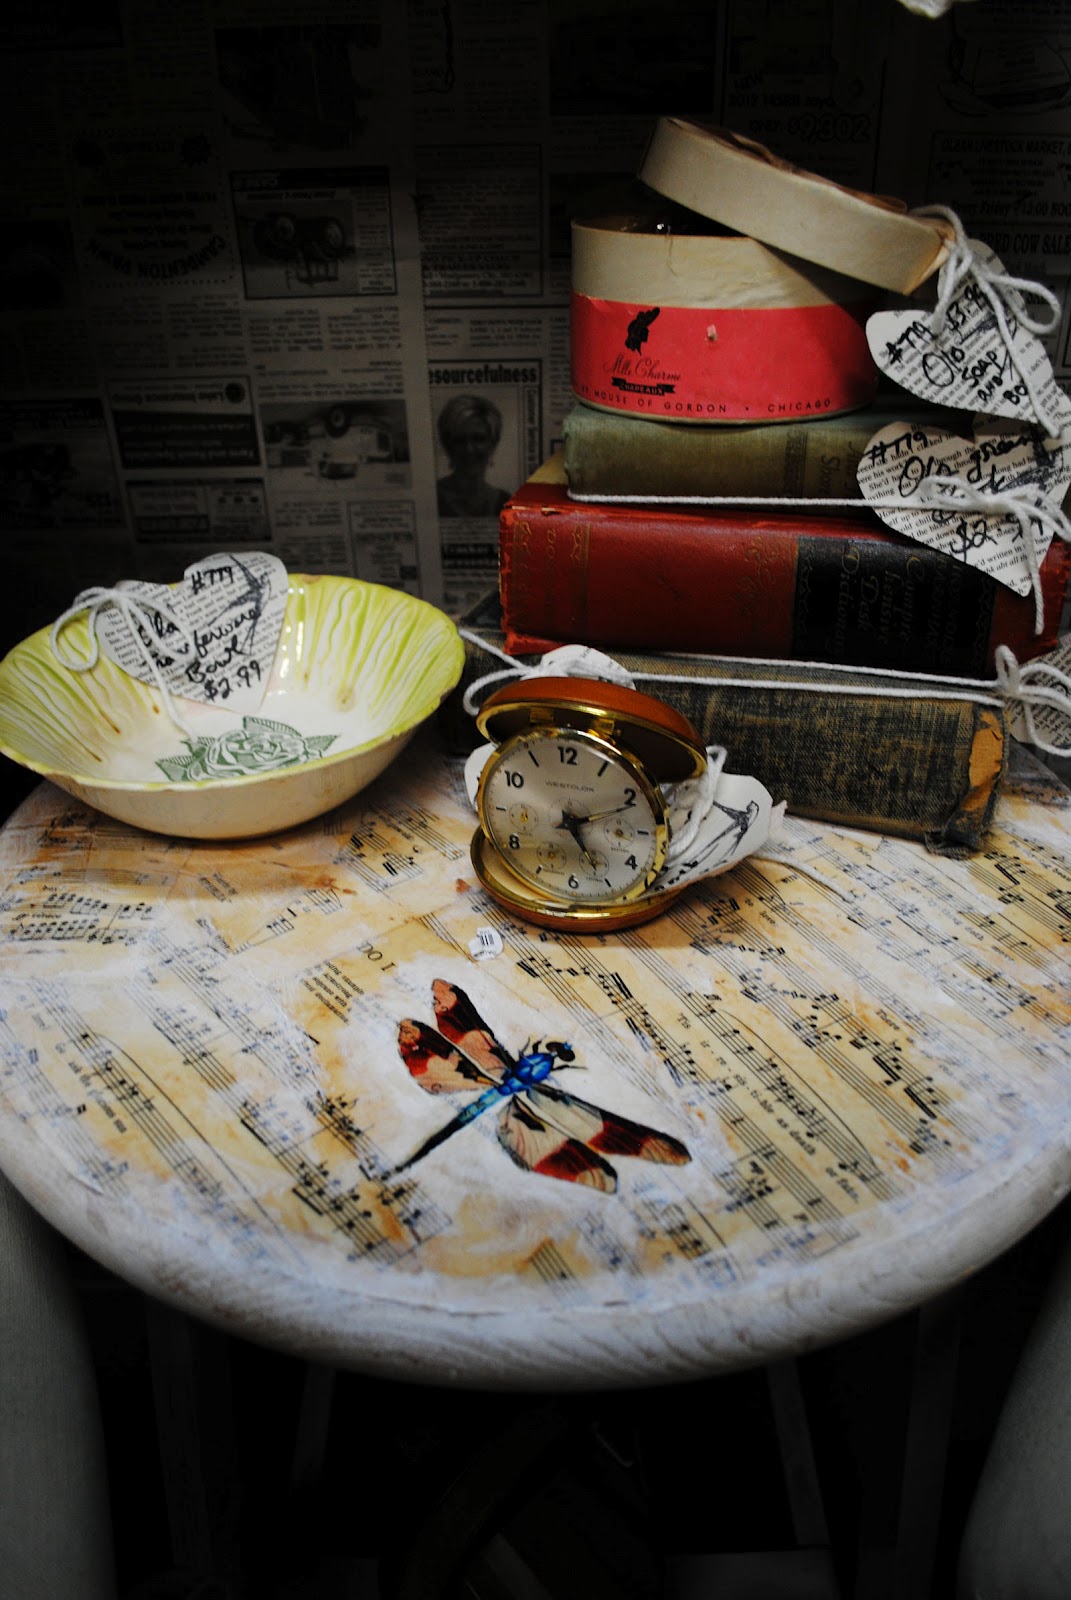
Here is another small fancy table treated similarly, but instead of drawing the dragonfly on, I printed it out. I learned how to use water slide transfers from a kind lady at http://thepolkadotcloset.blogspot.com/2011/03/using-water-slide-decals.html. The proprietress there shares all of her crafts and is a major inspiration for me. Thanks Polka dot Closet!

Some more hand-crafted things are on top of the piano bench. There are some great close ups here
of the bottle.

.The "Dream" board sports a crown found at The Graphics Fairy too. I love her vintage images, and can't get enough! I also had fun decorating that lampshade on the right.

Thanks for coming to my booth today. I hope you enjoyed your time here! And just so you know some days when  I write I feel fun and bouncy, like today. Other times I am thoughtful and post deeper ideas like yesterday when I wrote about breast cancer. It is all the same person. I know we all have our moods, so I hope you will understand. Some of the posts will be Photo shop intensive and look very different from images like here, where I want you to see the booth only. Often times I will manipulate an image to express a feeling or an idea. Those times will have different colors added and other tricks so I can communicate better with you, the reader. Stick with me as I grow as an artist, business owner and blogger. I look forward to our time spent together and would love to read your blog too.